WSTG - Stable
Leveraging Dev Tools
This appendix outlines various details for use of in browser Developer Tool functionality to aid in security testing activities.
Obviously in browser functionality is not a substitute for: DAST (Dynamic Application Security Testing) tools, SAST (Static Application Security Testing) tools, or a tester’s experience, however, it can be leveraged for some testing activities and report production related tasks.
Accessing Dev Tools
Opening Dev Tools can be accomplished in a number of ways.
- Via the keyboard shortcut
F12. - Via the keyboard shortcut
ctrl+shift+ion Windows. - Via the keyboard short cut
cmd+option+ion Mac. - Via the web page right-click context menu and then selecting
Inspectin Google Chrome. - Via the web page right-click context menu and then selecting
Inspect Elementin Mozilla Firefox. - Via the triple dot ‘kabob’ menu in Google Chrome then selecting
More Toolsand thenDeveloper Tools. - Via the triple line ‘hamburger’ (or ‘pancake’) menu in Mozilla Firefox then selecting
Web Developerand thenToggle Tools. - Via the gear icon settings menu in Edge/IE then selecting
Developer Tools.
NOTE: The majority of the instructions below assume that Dev Tools is already open or active.
Capabilities
| Functionality | Chrome* | Firefox | Edge/IE | Safari |
|---|---|---|---|---|
| User-Agent Switching | Y | Y | Y | Y |
| Edit/Resend Requests | N | Y | N | N |
| Cookie Editing | Y | Y | Y | N |
| Local Storage Editing | Y | Y | Y | N |
| Disable CSS | Y | Y | Y | Y |
| Disable JavaScript | Y | Y | N | Y |
| View HTTP Headers | Y | Y | Y | Y |
| Screenshots | Y | Y | Y | N |
| Offline Mode | Y | Y | N | N |
| Encoding and Decoding | Y | Y | Y | Y |
| Responsive Design Mode | Y | Y | Y | Y |
* Anything that applies to Google Chrome should be applicable to all Chromium based applications. (Which includes Microsoft rebadging Edge around 2019/2020.)
User-Agent Switching
Related Testing
Google Chrome
- Click on triple dot ‘kabob’ menu on the right side of the Developer Tools pane, select
More toolsthen selectNetwork conditions. - Un-check the “Select automatically” checkbox.
- Select the user agent from dropdown menu or enter a custom user agent
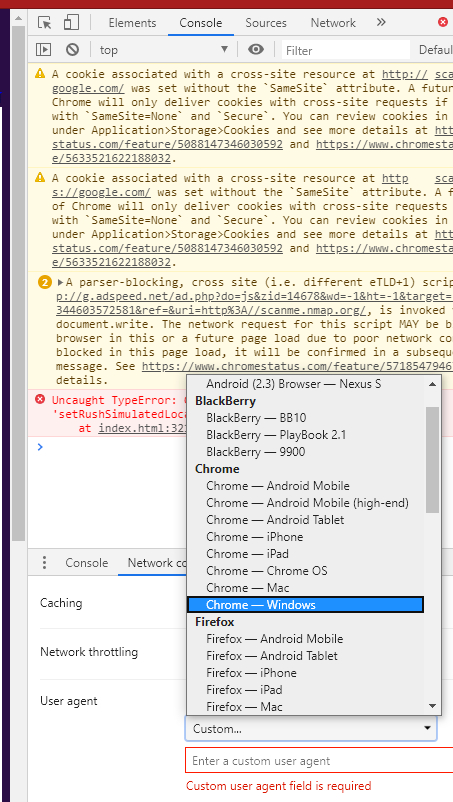
Figure 6.F-1: Google Chrome Dev Tools User-Agent Switching Functionality
Mozilla Firefox
- Navigate to Firefox’s
about:configpage and clickI accept the risk!. - Enter
general.useragent.overrideinto the search field. - Look for
general.useragent.override, if you can’t see this preference, look for one that show a set of radio buttonsBoolean, Number, StringselectStringthen click the plus signAddbutton on theabout:configpage. - Set the value of
general.useragent.overrideto whatever User-Agent you might need.
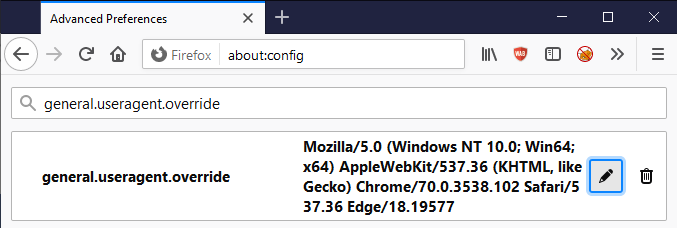
Figure 6.F-2: Mozilla Firefox User-Agent Switching Functionality
Later click on the garbage can Delete button to the right of the general.useragent.override preference to remove the override and switch back to the default user agent.
Edit/Resend Requests
Related Testing
- Authentication Testing
- Authorization Testing
- Session Management Testing
- Input Validation Testing
- Business Logic Testing
Mozilla Firefox
- Select the
Networktab. - Perform any action in the web application.
- Right-click on the HTTP request from the list and select
Edit and Resend. - Make desired modifications and click on the
Sendbutton. - Right-click on the modified request and select
Open in New Tab.
Cookie Editing
Related Testing
- Authentication Testing
- Authorization Testing
- Session Management Testing
- Testing for Cookie Attributes
Google Chrome
- Click the
Applicationtab. - Expand
Cookiesunder theStorageheading. - Select the relevant domain name.
- Double click in the
Valuecolumn to edit any cookie value.
Note: Cookies can be deleted once selected by pressing the
deletekey, or from the right-click context menu.
Mozilla Firefox
- Click the
Storagetab. - Expand the
Cookiessection. - Select the relevant domain name.
- Double click in the
Valuecolumn to edit any cookie value.
Note: Cookies can be deleted once selected by pressing the
deletekey, or with various options from the right-click context menu.
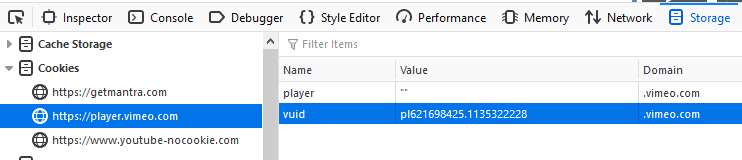
Figure 6.F-3: Mozilla Firefox Cookie Editing Functionality
Local Storage Editing
Related Testing
Google Chrome
- Click the
Applicationtab. - Expand
Local Storageunder theStorageheading. - Select the relevant domain name.
- Double click in the
Valuecolumn to edit any cookie value. - Double click in the applicable Cell to edit the
KeyorValue.
Note: Editing
Session StorageorIndex DBfollows essentially the same steps.Note: Items can be added or deleted via the right-click context menu.
Mozilla Firefox
- Click the
Storagetab. - Expand the
Local Storagesection. - Select the relevant domain name.
- Double click in the applicable Cell to edit the
KeyorValue.
Note: Editing
Session StorageorIndex DBfollows essentially the same steps.Note: Items can be added or deleted via the right-click context menu.
Disable CSS
Related Testing
General
All major browsers support manipulating CSS leveraging the Dev Tools Console and JavaScript functionality:
- To remove all external style-sheets:
$('style,link[rel="stylesheet"]').remove(); - To remove all internal style-sheets:
$('style').remove(); - To remove all in-line styles:
Array.prototype.forEach.call(document.querySelectorAll('*'),function(el){el.removeAttribute('style');}); - To remove everything from head tag:
$('head').remove();
Disable JavaScript
Google Chrome
- Click on triple dot ‘kabob’ menu on the right side of the web developer toolbar and click on
Settings. - On the
Preferencestab, under theDebuggersection, check theDisable JavaScriptcheckbox.
Mozilla Firefox
- On the dev tools
Debuggertab, click on the settings gear button in the upper right corner of the developer toolbar. - Select
Disable JavaScriptfrom the dropdown (this is an enable/disable menu item, when JavaScript is disabled the meny item has a check mark).
View HTTP Headers
Related Testing
Google Chrome
- On the
Networkingtab in Dev Tools select any URL or request. - In the lower right hand pane select the
Headerstab.
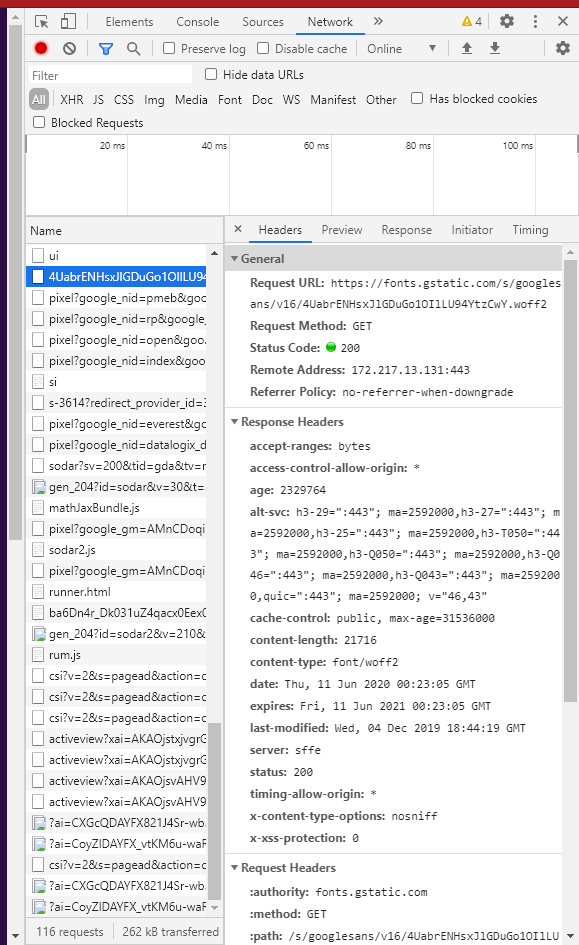
Figure 6.F-4: Google Chrome Headers View
Mozilla Firefox
- On the
Networkingtab in Dev Tools select any URL or request. - In the lower right hand pane select the
Headerstab.
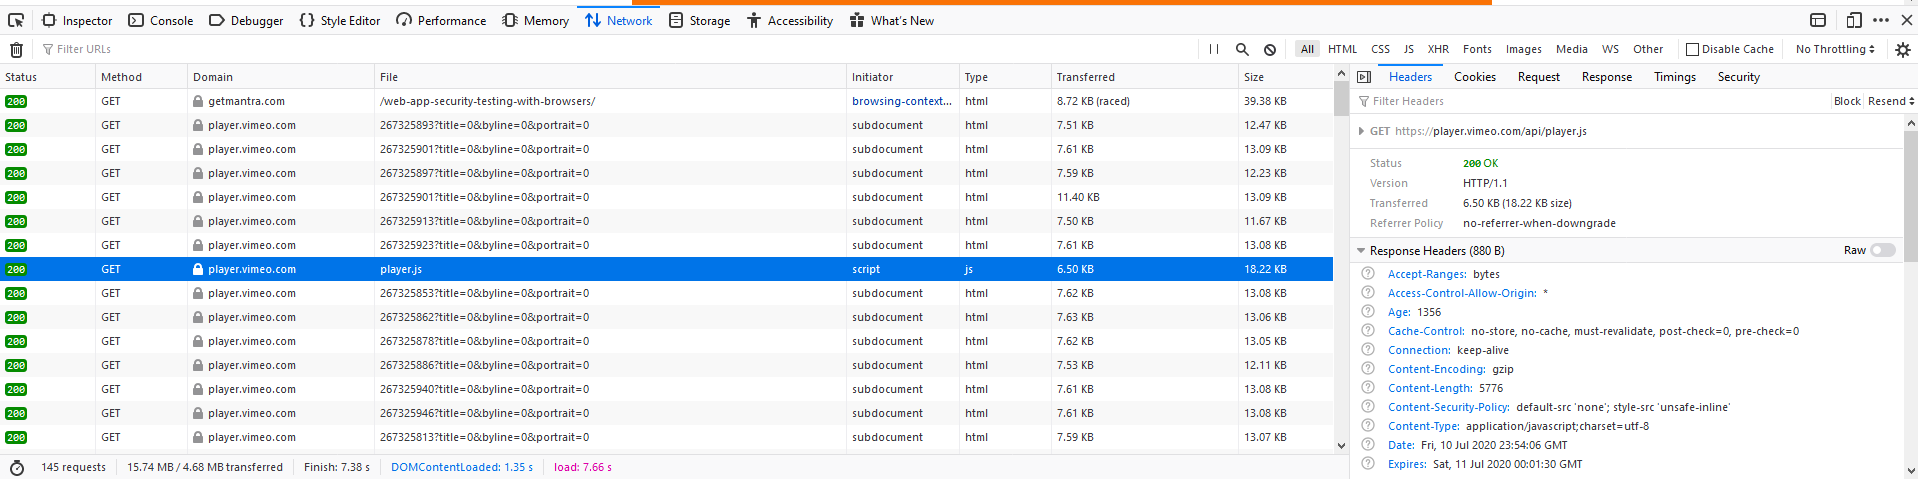
Figure 6.F-5: Mozilla Firefox Headers View
Screenshots
Related Testing
Google Chrome
- Press on the
Toggle Device Toolbarbutton or pressctrl+shift+m. - Click the triple dot ‘kabob’ menu in the Device Toolbar.
- Select
Capture screenshotorCapture full size screenshot.
Mozilla Firefox
- Press the triple dot
ellipsisbutton in the address bar. - Select
Take a Screenshot. - Select either the
Save full pageorSave visibleoption.
Offline Mode
Google Chrome
- Navigate to
Networktab. - In the
Throttledropdown selectOffline.
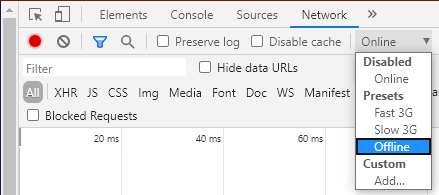
Figure 6.F-6: Google Chrome Offline Option
Mozilla Firefox
- From the triple line ‘hamburger’ (or ‘pancake’) menu select
Web Developerand thenWork Offline.
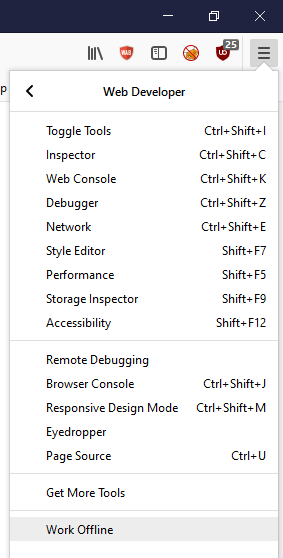
Figure 6.F-7: Mozilla Firefox Offline Option
Encoding and Decoding
Related Testing
- Many (perhaps even most) types of Web Application Security Testing can benefit from various types of encoding.
General
All major browsers support encoding and decoding strings in various ways leveraging the Dev Tools Console and JavaScript functionality:
- Base64 encode:
btoa("string-to-encode") - Base64 decode:
atob("string-to-decode") - URL encode:
encodeURIComponent("string-to-encode") - URL decode:
decodeURIComponent("string-to-decode") - HTML encode:
escape("string-to-encode") - HTML decode:
unescape("string-to-decode")
Responsive Design Mode
Related Testing
- Testing for Browser Cache Weaknesses
- Testing for Weaker Authentication in Alternative Channel
- Testing for Clickjacking
Google Chrome
- Click the
Toggle device toolbarbutton or pressctrl+shift+m.

Figure 6.F-8: Google Chrome Responsive Design Mode
Mozilla Firefox
- Click the
Responsive Design Modebutton or pressctrl+shift+m.
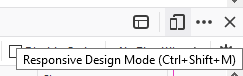
Figure 6.F-9: Mozilla Firefox Responsive Design Mode